Table of Contents
Geographic Places
Regions
Every Country belongs to its Region - the largest unit in geographic places.
These regions correspond to the geographical location.
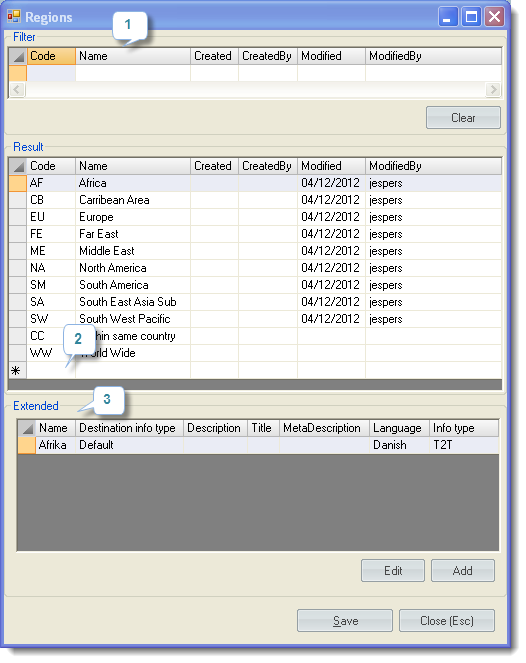
- Filter option: You can choose to filter regions by typing in letters or words. E.g. if you would like to see all the regions that begin with the letter “A”, click on a text box, type “a” and push Enter on your keyboard.
- To add a new region, simply click in the first empty cell in an empty row, and start filling out the information. Code and Name are mandatory.
Countries
Information about countries is stored in this table.
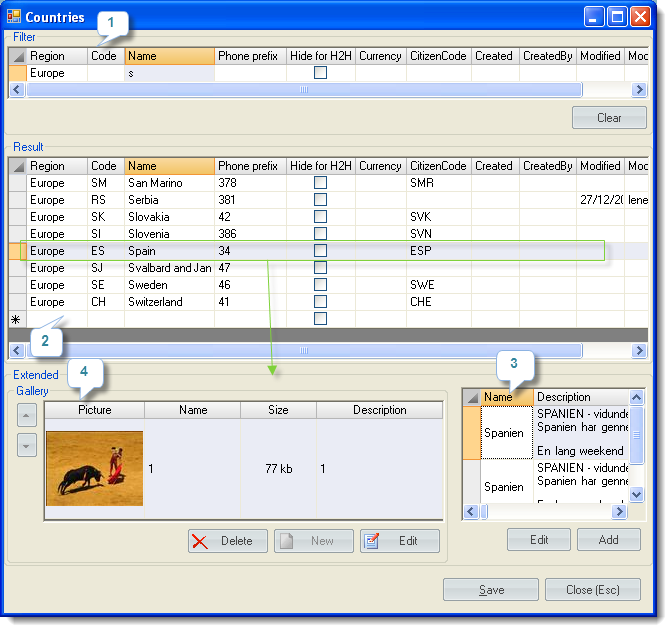
- Filter option: You can choose to filter countries by typing in letters or words, by presence/absense of a checkbox, or choose a region you woud like to see countries belong to. E.g. if you would like to see all the countries in region Europe, click on a first listbox and select a region name.
- To add a new country, simply click in the first empty cell in an empty row, and start filling out the information. You do not need to fill out all the cells/check boxes, but at least Region, Code and Name.
Note
State codes ('Code') are unique only within the same country.
Cities/Airports
Information about cities is stored in this table.
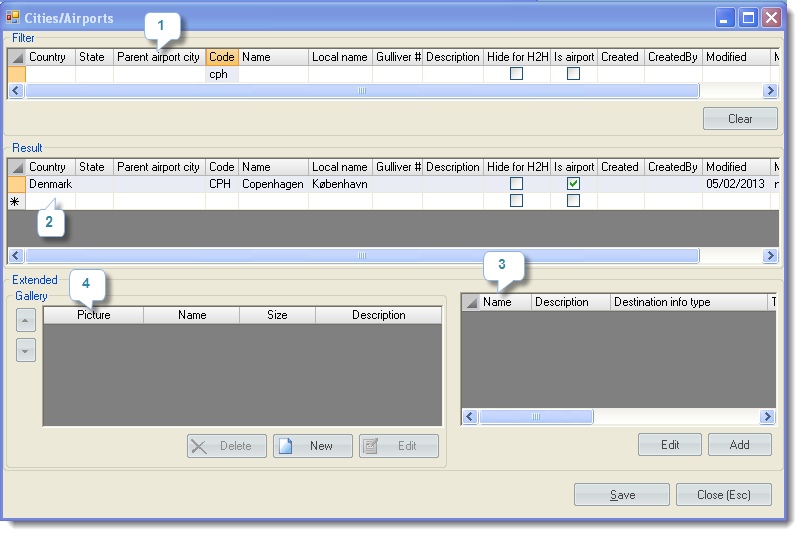
- Filter option: You can choose to filter cities by typing in letters or words, by presence/absense of a checkbox, or choose a country/parent airport city you woud like to see cities belong to. E.g. if you would like to see all the cities in Denmark, click on a first listbox and select a country name.
- To add a new city, simply click in the first empty cell in an empty row, and start filling out the information. You do not need to fill out all the cells/check boxes, but at least Country, Code and Name.
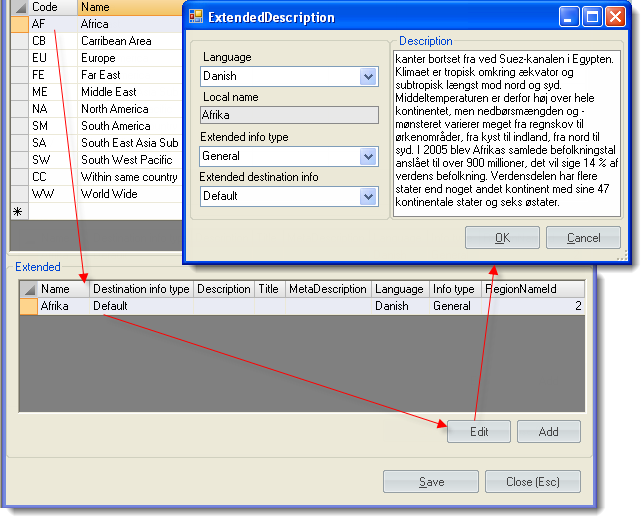
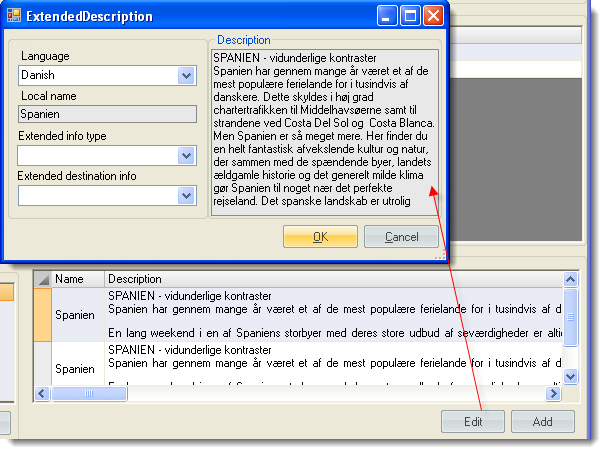
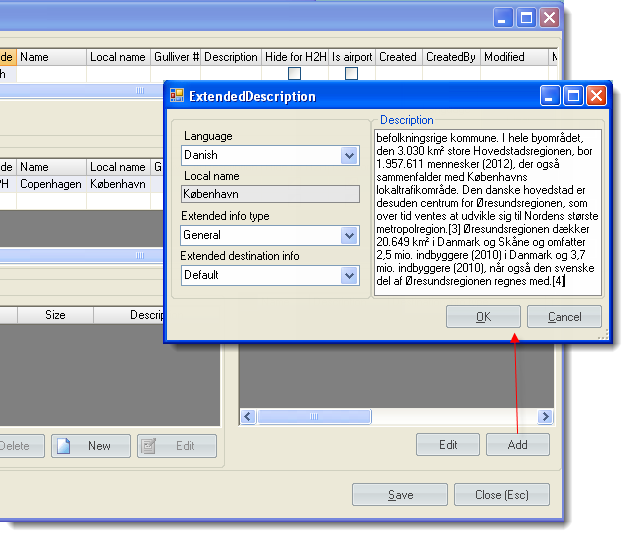
- To add a translation/description, push Add button in extended info groubox. Select an existant translation and push Edit or double-click the translation/description you would like to edit. Languages for different types of reports are defined in ‘Company Settings’ and only an airline that has the same language is taken to be shown in the report. The default name is shown on the reports if there is no translation of the roomtype on the language which is specified in ‘Company Settings’.
Postal Data
This table keeps zip codes for the cities
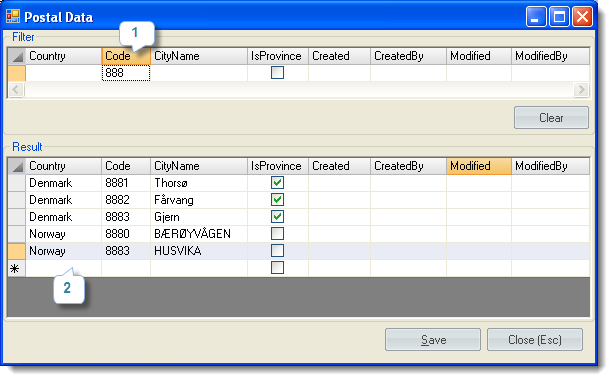
- Filter option: You can choose to filter postal codes by typing in letters or words. E.g. if you would like to see all the pstal codes that begin with the digit “8”, click on a Code text box, type “8” and push Enter on your keyboard.
- To add a new line, simply click in the first empty cell in an empty row, and start filling out the information. Country, Code and City Name are mandatory. When you are done, click Save.
City Areas
City areas allow to siplify for example hotel rates search. It can be used an additional filter while searching rates or identify the hotel location more precisely.
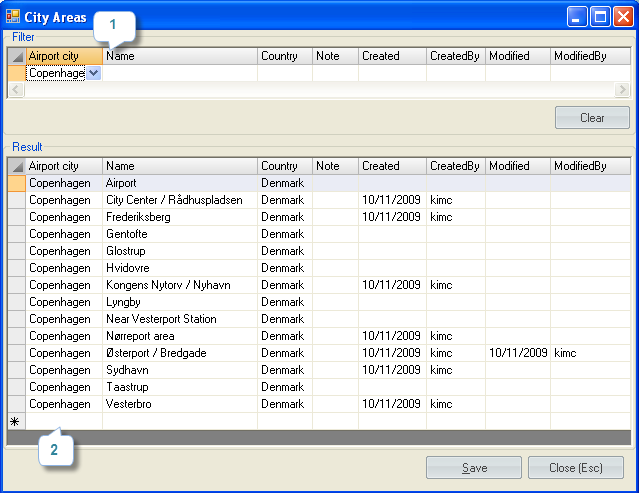
- Filter option: You can choose to filter city areas by typing in letters or words or by choosing an Airport city you woud like to see areas belong to
- To add a new line, simply click in the first empty cell in an empty row, and start filling out the information. Airport City, Name and Country are mandatory. When you are done, click Save.
Locations
Locations allow to siplify for example hotel rates search. It can be used an additional filter while searching rates or identify more precisely where the hotel is located.
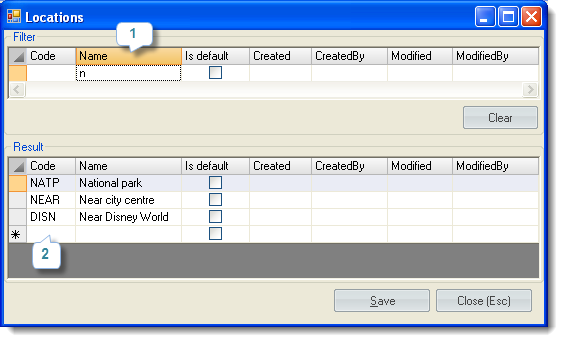
- Filter option: You can choose to filter locations by typing in letters or words or by by presence/absense of a checkbox.
- To add a new line, simply click in the first empty cell in an empty row, and start filling out the information. Code and Name are mandatory. When you are done, click Save.
Fee Region
Fee Region table is designed for managing VAT Rules for a specific Product. These are not geographic region but regions for which VAT should be handled.
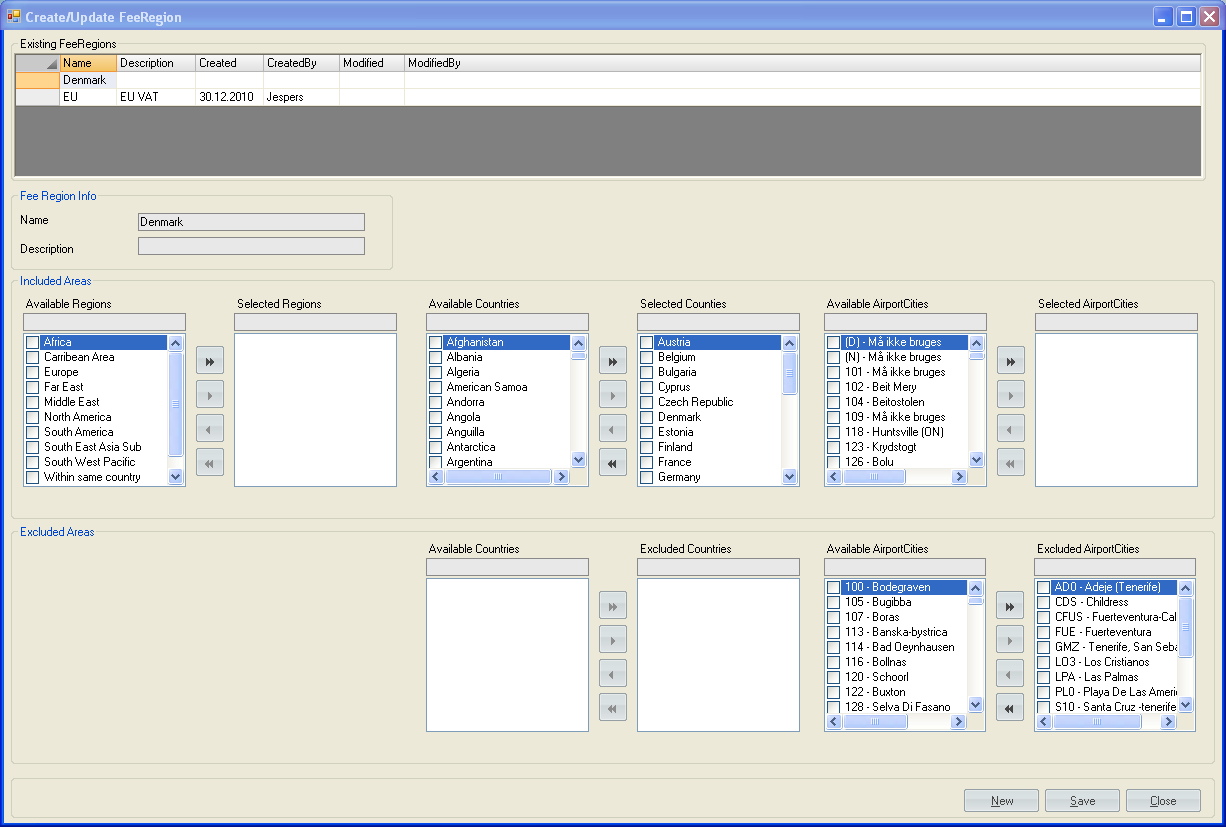
To create a Fee Region
- Press ‘New’ button
- In ‘Fee Region Info’ fill in the ‘Name’
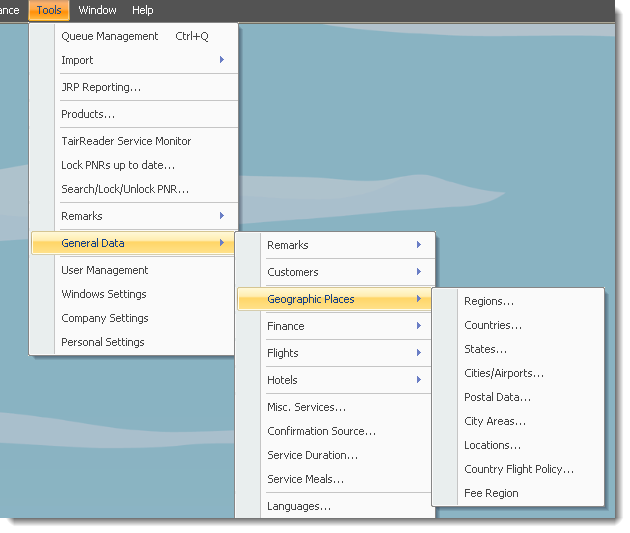
- In ‘Included areas’ select the ‘Regions’. (this list is taken from TrevelWise library stored in: Tools → General data → Geographic Places → Regions; under the same ‘Geographic Places → …’ submenu the Countries and Cities/Airports are kept).
- In ‘Excluded Areas’ select those Countries, Cities for which the VAT rule, which is going to be applied for the newly created region, is not supposed to take an action.
- Push ‘Save’ button (‘Alt+S’).
Note
In case the country was selected, the cities which are related to that country become selected automatically and are not visible in ‘Available Airport Cities’, BUT
are shown in ‘Excluded Areas’ section and can be excluded separately.
To edit a Fee Region
- Select any Fee Region in the ‘Existing FeeRegions’ list.
- Make any changes.
- Push ‘Save’ button (‘Alt+S’).
