This is an old revision of the document!
Table of Contents
Issue Invoice (Offer)
Use buttons in Payment Documents section to create invoice: 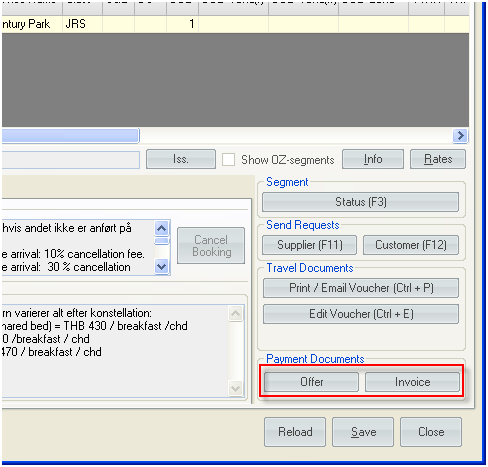
Offer is Invoice draft. It can be changed and deleted, it doesn’t have document number.
All segments which have OK status are imported to the offer automatically.
Invoice has document number and it cannot be deleted.
All segments with OK status and linked with document are imported to the offer automatically.
Print/Email Options
If you click Offer button you can issue offer or invoice.
Print/E-Mail Offer is used to issue offer.
The 'Print/E-mail options' opens in a separate box: 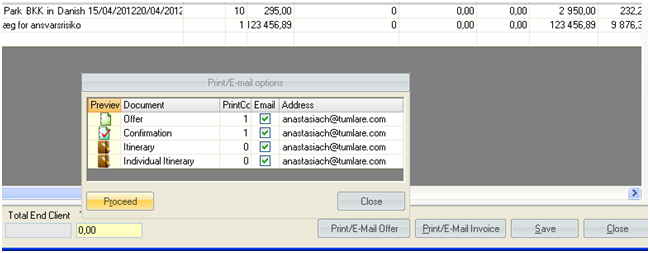
From that box you can set:
- the amount of copies of to be printed – set a number of copies and click Proceed to print;
- e-mail – set an address and click Proceed to send;
- preview - click the icon in front of document name.
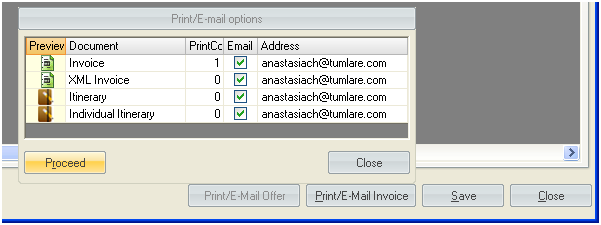
Print/E-Mail Invoice is used to issue invoice.
The 'Print/E-mail options' for invoice opens in a separate box: 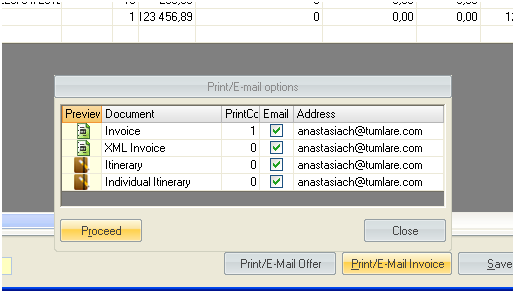
From 'print/e-mail invoice' options you can set the same as for offer:
- the amount of copies of to be printed – set a number of copies and click Proceed to print;
- e-mail – set an address and click Proceed to send;
- preview - press the icon in front of document name.
If you print/email invoice the invoice will get a number and you won’t be allowed to delete it.
You can issue invoice without printing or emailing if you set all print copies =0 and remove all checkmarks from Email checkbox and click Proceed.
If you click Save without printing or emailing the offer will be saved.
If you click Invoice (F10) on order form, only Print/Email Invoice options are available. The workflow is the same.
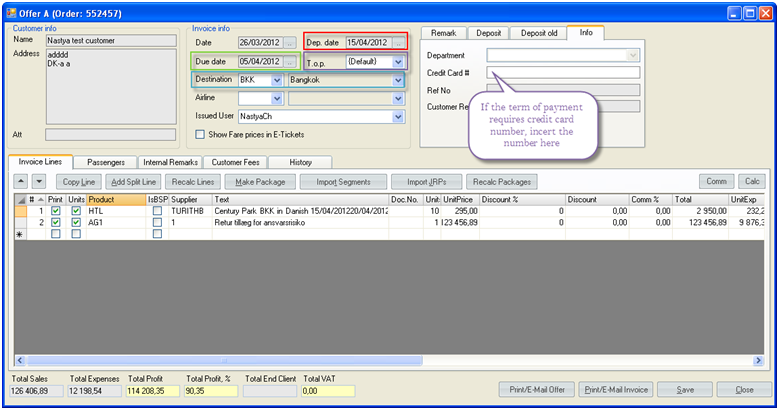
Manual creation of invoice line
- Choose an appropriate product code.
- Choose a supplier for selected product from the dropdown list (these suppliers are taken from product profile: Tools → Products. If there is only one supplier linked to the product – it will be filled automatically).
- Text is filled in automatically by product name as soon as a product code selected. This text can be edited and actual text will be displayed on invoice preview or on printed/sent invoice.
- It is possible to link documents to the invoice line. It can be manual documents or existent vouchers (for example if you already have segment with issued document in the order). How to link a document to an invoice line:
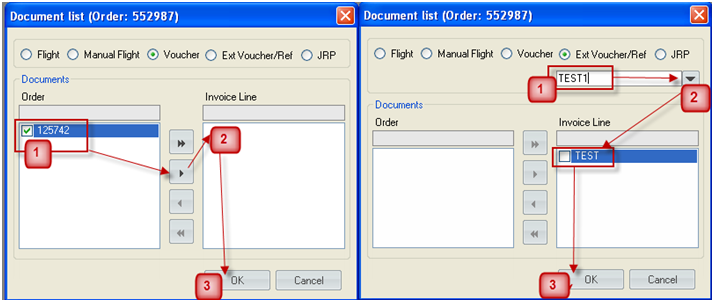
- Internal voucher (issued in TravelWise):
- Put a tick in front of those voucher numbers which you want to link to invoice line (you can link several by once)
- Use arrows to move selected vouchers to the right column (Invoice Line)
- Click OK to save changes
- Manual (External voucher)
- Insert the number of voucher (it can contain digits and letters)
- Use arrow to move inserted number to the right column (Invoice Line)
- Click OK to save the changes. Note: You can add several invoice numbers to ‘Invoice Line’ column and then link them all at once.
- Fill in prices, discounts, VAT (this all can be predefined on Product’s profile: Tools → Products)
