JRP Printer Setup
For adding JRP Printer follow these steps:
Open Printers by clicking the
Start button

, clicking
Control Panel, clicking
Hardware and Sound, and then clicking
Printers or by clicking
Start button →
Devices and Printers Click Add a printer.
In the Add Printer Wizard, select Add a local printer.
On the Choose a printer port page, select the Create a new port option button and the Standart TCP/IP Port, and then click Next.
For the
Hostname or IP address, enter the exact IP address of the printer and click
Next.
For JTB Finland IP address is 10.60.70.192 On the Additional port information required page, make sure that the Standart option button and the Generic Network Card are selected, and then click Next
On the
Install the printer driver page click
Have Disk button, on the
Install from disk dialog window click
Browse…, enter the path for
File name.
For JTB Finland the path is \\travelwise-hel. Then click
Open. Select
JRPPrinterDrivers folder and then the version of your operation system, select drievr file and click
Open.
For JTB Finland driver fiel is ECSP605.INF. On the
Install from disk dialog window click
OK, on the
Install the printer driver page click
Next.
As a printer name enter JRPPrinter.
Select option Do not share this printer → Next.
Finish
Make sure the JRPPrinter is not set as your default printer.
For setting up JRPPrinter:
Open Printer Preferences from the context menu.
On the
JRPPrinter Printing Preferences go to the
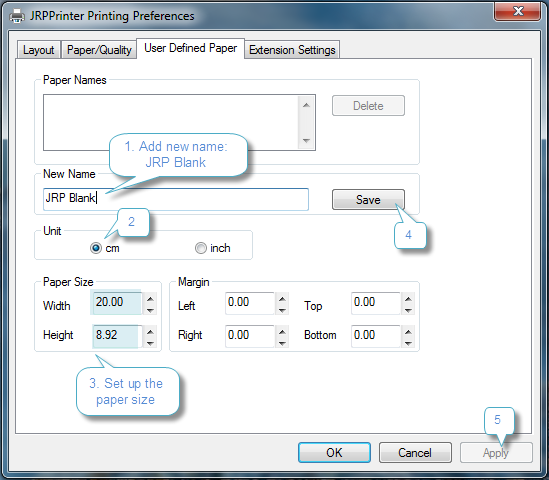
User Defined Paper tab and add new paper 'JRP blank':

On the
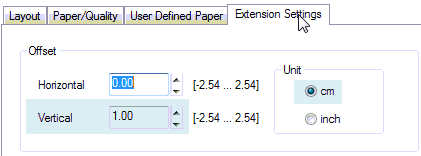
Extention Settings tab set up vertical offset:

On the
Layout tab click
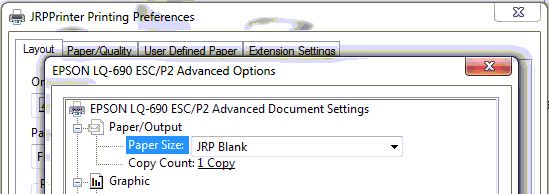
Advanced… and select JRP Blank for a Paper Size:

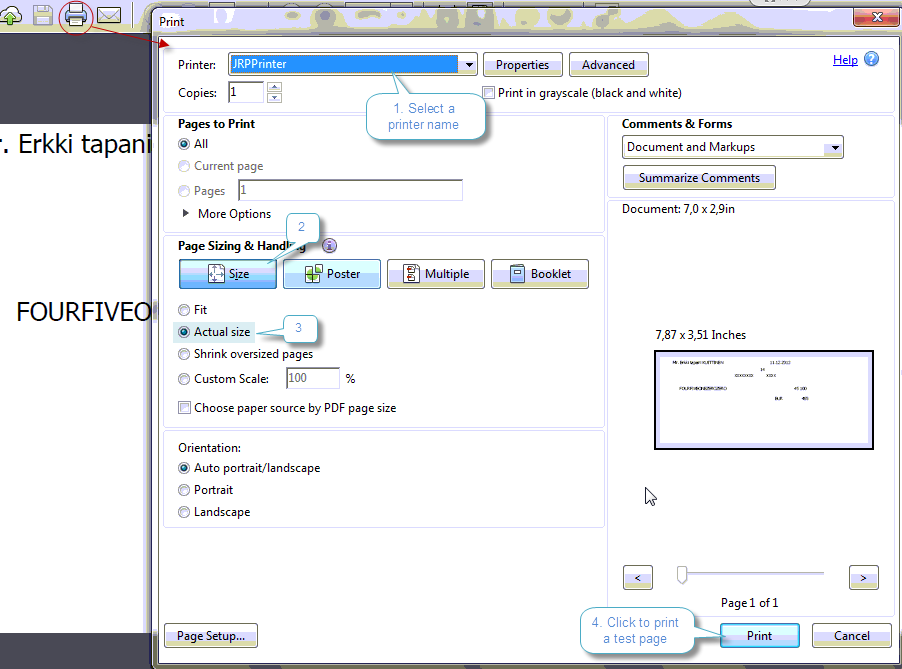
Open an order with JRP segment in TravelWise → make a report preview and click Print button
Make the following printing settings:


