Table of Contents
Voucher Issue
To issue a voucher the following must be arranged:
• book any non-flight segment;
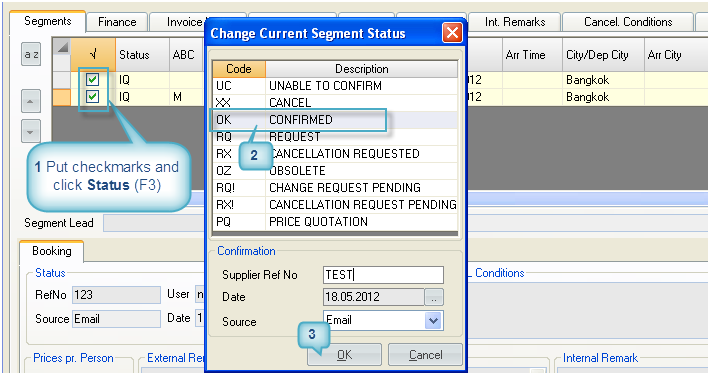
• set confirmed ‘OK’ status for it via ‘Status’ form (in Order push button Status (F3)):
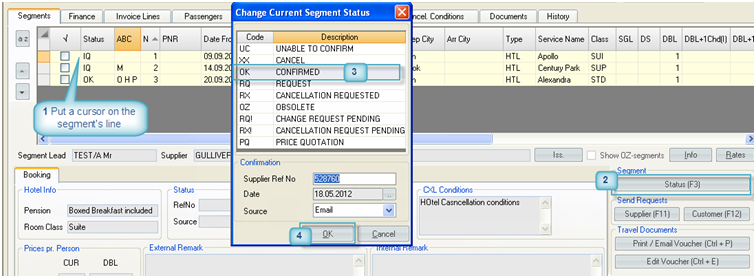
It is allowed to change the statuses of several segments of the same supplier and status:
• print out the voucher or send it via e-mail:
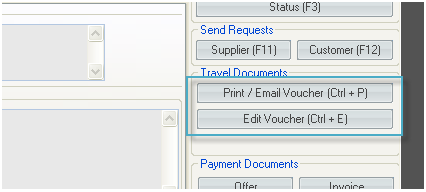
There are options to Preview and Edit vouchers before issuing. To Edit the voucher, push Edit Voucher (Ctrl+E). From the opened form it is be possible to:
- Edit;
- Preview;
- Print (voucher gets a number);
- E-mail (voucher gets a number);
- Update (to save the changes);
- Reload (to get the updated information; for example - you preview a Voucher for Hotel and then added a Misc segment and would like to get this information updated in the voucher, then hit ‘Reload’ button).
Voucher Printing
to open the voucher printing form, push 'Print/E-mail Voucher' button (Ctrl+P):
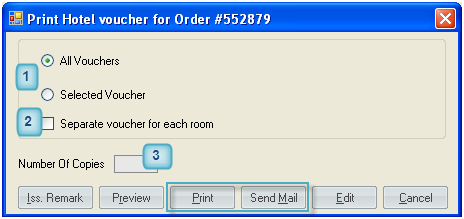
Set the number of copies to be printed, select ‘All Vouchers’ or ‘Selected Voucher’ mode and push ‘Print’ button (Alt+P).
- Use ‘All vouchers’ mode to issue vouchers for all segments in the order at once, use ‘Selected Voucher’ mode to issue voucher only for selected segment.
- Use 'Separate voucher for each room' option if there are several rooms in the hotel and you want to issue separate voucher for each room. Note that if there is MISC segment connected with the hotel, separate voucher for MISC will be issued as well.
- Put the number of copies and click Print (Alt+P) if you want to print voucher. Voucher can be issued using Print (Alt+P) or Send Mail (Alt+M) buttons (it gets a number)
Voucher can also be printed from ‘Edit voucher’ mode, but from there it is not possible to print out or e-mail vouchers for all segments by 'one click'.
Voucher Mailing
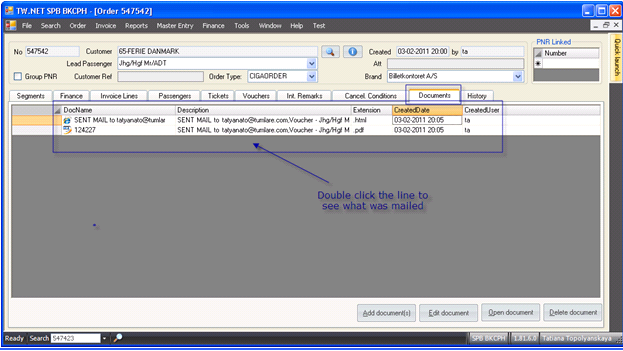
It is allowed to send the vouchers by e-mail from both printing (Ctrl+P) and editing (Ctrl+E) forms. Push 'Send Mail' button (Alt+M) to open a mail form.
'Print' and 'Send Mail' buttons are disabled when the segment for which you are trying to issue the voucher is not confirmed (not ‘OK’).
Opening the mail form takes time as the Voucher becomes converted in a ‘pdf’ format and gets attached to the mail:
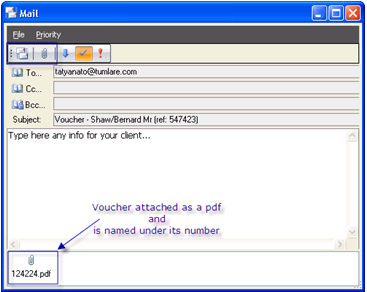
You can change default e-mails, subject and add some text in a mail if needed.
The title of the mail by default is:
Voucher – Customer name (ref: OrderNo)
To attach any file push (Alt+A)
![]()
To send the e-mail push (Alt+S)
![]()
Note
- When there is an e-mail in Order in 'Att.' field, then all e-mails from 'Print/Email Options' and vouchers are sent to it in CC.
- In subject '<LastName>/<FirstName> <PaxType> (ref: <RefNo>)' leader of the segment is taken
To mail/print vouchers for specific segments only
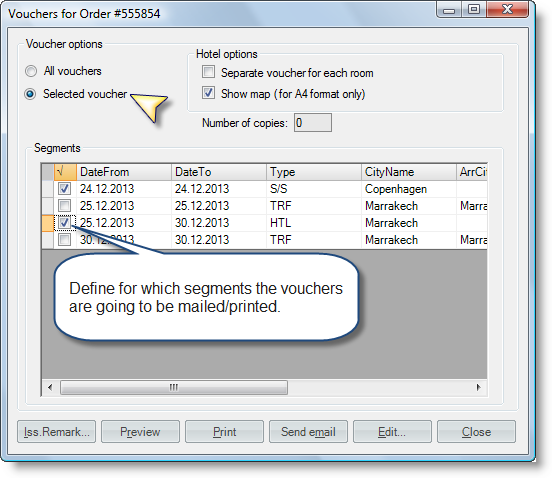
In 'Voucher Options' choose 'Selected voucher' and define for which segments the vouchers are going to be mailed/printed.
